

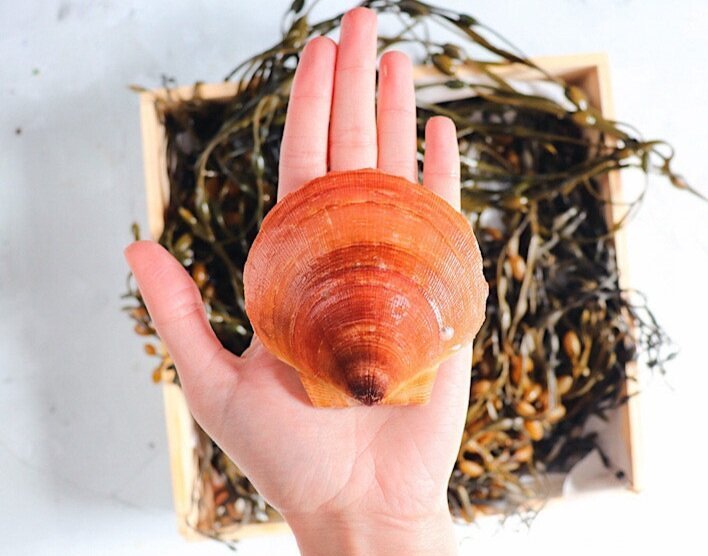
How to Shuck a Scallop
Nothing quite beats a scallop, fresh from the shell. Once shucked, the possibilities are endless, from creative raw crudo on the half-shell to grilled sweet and savory morsels. Although it is still a rarity, farmed scallops sold in the shell direct-to-restaurants, and even direct-to-consumers is increasing in popularity. And in reality, this is the best way to ensure that your scallops are fresh and of utmost deliciousness.
If you can shuck an oyster, you can definitely shuck a scallop. The amount of technical skill that goes into shucking a scallop is far less than required for an oyster. However, I will warn you, scallops can be a bit . . . strong, and, dare I say it, interactive during the shucking process. (Yes, sometimes they move).
But that shouldn’t deter you. I highly recommend trying your hand at shucking scallops at home not only because you will experience the freshest, most delectable scallop meat you’ve likely ever had, but the process will also give you an appreciation for the anatomy of the scallop and insight into how the creature thrives.
How to Shuck a Scallop
Tools. The only two tools you will need to shuck a scallop are (1) a blunt knife, and (2) a colander to rinse the scallops in once you’ve finished shucking them. You can get away with using the blunt edge of a butter knife to open the scallop shell, although I prefer using either an oyster knife or a clam knife, as I feel this makes the process a bit smoother.
Steps
Insert your knife into the hinge of the shell, and twist to pop it open. Alternatively, because scallops will naturally open and close their shells to breathe, you can take advantage of when the shell is open to insert your knife in between the open shells. (Don’t be surprised if the scallop begins to close its shell in response, though!)
Open the Shell: Slide your knife down the flat side of the top shell to separate the scallop meat from the top shell. Once separated, pull the top shell off completely.
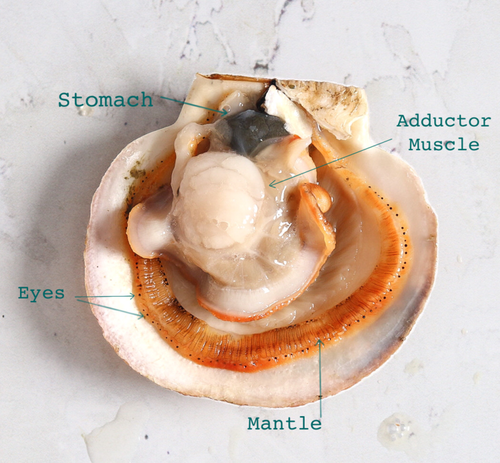
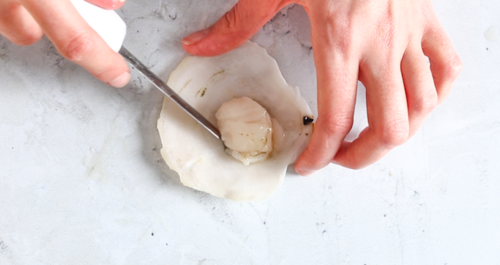
Cut Away the Stomach Sack: Using a sharper kitchen knife, make an angled incision to cut away the black stomach sack from the white scallop meat.
Pull Away the Mantle: Once the stomach sack has been cut away, you will be able to pull off the top and bottom mantles (“frills”) with your hands. These can be discarded, or incorporated as a base for a seafood stock.
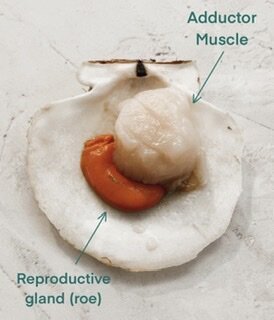
The Roe: Some folks prefer to leave the coral roe, which contains the sex organs of the scallop. However, I have found that this organ does not provide much from a flavor perspective, and I remove this with my hands as well.
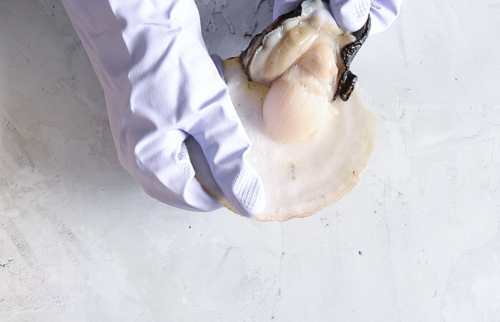
Separate the Muscle: Using your knife, scrape along the underside of the scallop to separate the meat from the bottom shell.
Rinse the Meat: Place the scallop meat in a colander and rinse under cold water for 1-2 minutes in order to remove any grit or waste material.


Storing Scallops
Store in your fridge with a temperature between 32-40 °F (0 to 5 °C).
Keep the scallops covered with a damp cloth to increase shelf-life. (I like covering mine in blankets of rockweed kelp).
If properly cared for scallops can live out of the water in their shell for around 3 days.
If not consumed within the 3 days, please shuck them as soon as possible to store the scallop meat for another 5 days in the fridge.
Yes, it is possible to freeze shucked scallops. You must shuck them and trim them first and put in a normal freezer bag. You can freeze them up to 5 days after receiving them.
